Width and height can be constrained proportionately and disproportionately by setting the link.
Here you can set rectangle angle (0–360) degrees. Then set individual corner strokes if they are not linked to the options of round, inverted round, or chamfer as well as a different corner radius for each of the four sides. Here you also have the option to scale corners as well as scale strokes and effects which is useful when you need to shrink or enlarge a shape. In some situations, however, you may just want the stroke to remain consistent when you scale so you can in those situations uncheck that option. Refer to Figure 6-64.
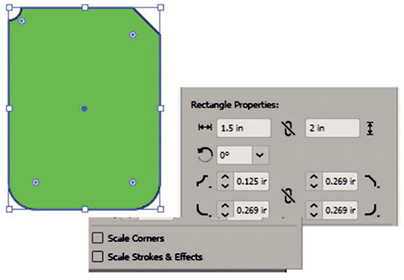
Figure 6-64. Alter the corner and radius for each side and uncheck from the Control panel Shape options Scale Corners and Scale Strokes and Effects when you do not want these options for your paths
These same settings will appear in the Transform panel in the related text box area. The Control panel and Transform panel will also allow you to set your x and ycoordinates and shear your shape. Some advanced options are found in the Transform menu for vertical and horizontal flipping. Refer to Figure 6-65.
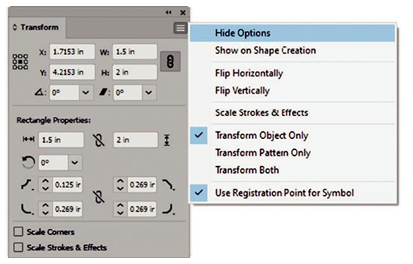
Figure 6-65. Transform panel has advanced options for scaling and transformation
Notice, however, if you switch and select an ellipse, polygon, or star path, the Shape area and Transform panel area vary this section. Refer to Figure 6-66.
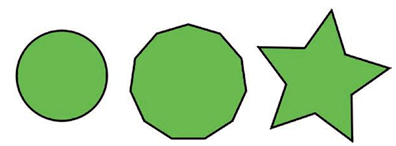
Figure 6-66. Ellipses, polygons, and star (path) have slightly different shape settings in the Control panel
Ellipses will allow us to change the width and height, constrain proportionately and disproportionately, rotate, change the pie angle start and end, constrain pie angles, and invert the pie. Refer to Figure 6-67.

Figure 6-67. Use the Control panel to set Shape options for the ellipse
For the polygon, you can set the number of sides to 3–20 unless you enter a custom number. You can also set polygon angle (0–360) degrees, corner type (round, inverted round, or chamfer), and corner radius for all sides. Then you can set the polygon radius and polygon side length. Refer to Figure 6-68.
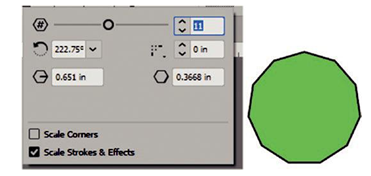
Figure 6-68. Use the Control panel to set Shape options for the polygon
The star, as noted earlier, comes in as a path. There is no Shape word link, but you can access this area from the x and y coordinates, w (width) and h (height) underlined letter links in the Control panel. Here you can see that you can still rotate or shear the star. However, when checked with the Transform panel, it will reveal that there are no shape properties. Refer to Figure 6-69.
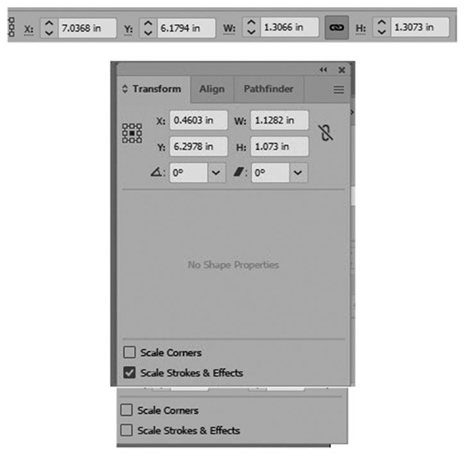
Figure 6-69. The Control panel has no Shape options for a star (path), and you must use one of the letters (X, Y, W, or H) to access more options or the Transform panel
Note The option to “scale corners” and “scale strokes and effects” remains consistent for all the mentioned shapes and paths, and you can check or uncheck this setting as required. Refer to Figure 6-69.