At the moment, you can use any one of the preset graphic styles found in the list; look for more using the lower left library icon.
However, to create your own graphic styles, you first need to create an appearance, which we will look at briefly along with styles and symbols later in Chapter 8. See the section “Creating Graphic Styles” in Chapter 8.
The next section, which I will mention in more detail later, is the Recolor Artwork and its new feature Generative Recolor. Refer to Figure 6-58.
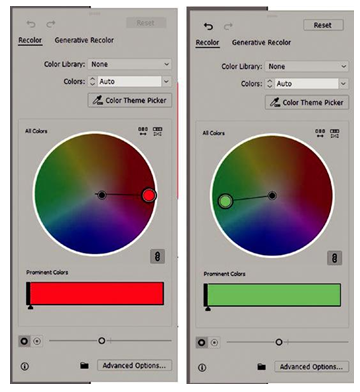
Figure 6-58. Recolor panel settings from the Control panel
This pop-out panel allows you to recolor your shape quickly even if it only has two colors and is connected to the Color Guide panel, whose similar dialog box can be accessed via the Advanced Options button. Refer to the section “Color Guide Panel” in Chapter 8. Refer to Figure 6-59.
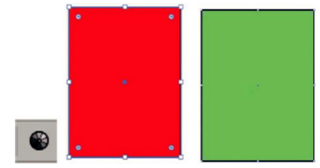
Figure 6-59. Before and after Recolor of a selected rectangle
The next section in the Control panel allows you to align multiple shapes when Shift+Click on them and then click an icon to align them. This has many of the similar settings as the Align panel mentioned in Chapter 4. You can also use Object ➤ Align and Object ➤ Distribute options from the main menu. Refer to Figure 6-60.
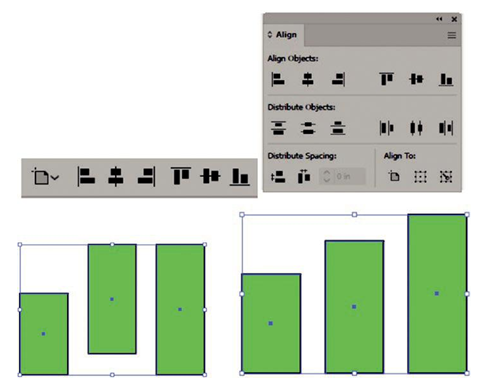
Figure 6-60. Control panel and Align Panel Options for aligning paths, shapes, and objects
When only one item is selected, it can be aligned to the artboard or to a selection.
Refer to Figure 6-61.
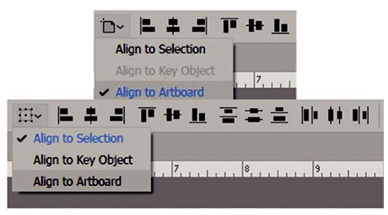
Figure 6-61. Control panel align and Distribute Options
However, when two or more items are selected, more options are available as seen in the Align panel such as Align to Selection and Align to Key Object. You can then see all the alignment options such as for Horizontal Alignment (Left, Center, Right), Vertical Alignment (Top, Center, Bottom), Vertical Distribute (Top, Center, Bottom), and Horizontal Distribute (Left, Center, Right). Refer to Figure 6-62.
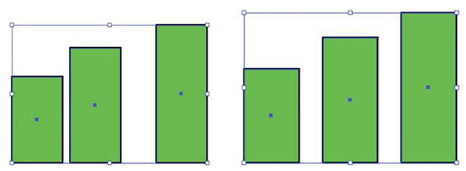
Figure 6-62. Use the Control panel to distribute selected objects such as horizontal distribute center
Use the Align panel to do additional distribution of spacing vertically and horizontally by a set value. Refer to Figure 6-60.
When a single shape is selected, the Shape or Transform panel choices will vary. You can see this when you click the shape name and additional items, and you will also see this in the Transform panel, also appearing at the same time. Similar options are available for the Rectangle and Rounded Rectangle. Refer to Figure 6-63.
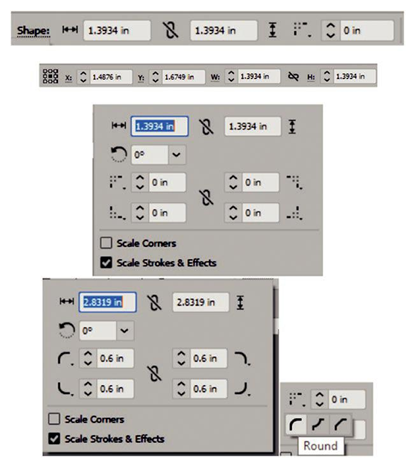
Figure 6-63. Use the Control panel to edit using Shape options found in the Transform panel as well