Use the link icon if you want both start and end arrowheads to scale at the same time with a similar ratio or percentage. Align the arrowhead to extend the arrow tip beyond end of path or place the arrow tip at end of path. The arrowheads work best for open paths but can be used on closed paths as well along with dashed lines. Set the arrowheads back to none in the drop-down list if you do not want them. Refer to Figure 6-53.
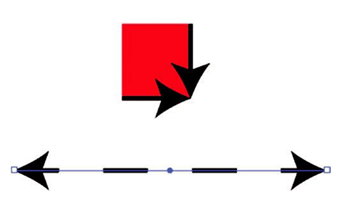
Figure 6-53. Arrowheads on a closed and open path with a dashed line
The last area in the Stroke panel and drop-down is Profile which can also be found in the main Control panel area. This allows you to set one of the variable width profiles for your line. Uniform is the default, but there are six other options. You can create your own custom options using the Width tool and its Width Point Options dialog box when you double-click a point or click to create a new point. Upon exiting the dialog box, you can then add the profile. While in the Stroke panel or drop-down list from the Control panel, you can flip certain profiles, along, across, or both ways depending on the profile chosen. Refer to Figure 6-54.
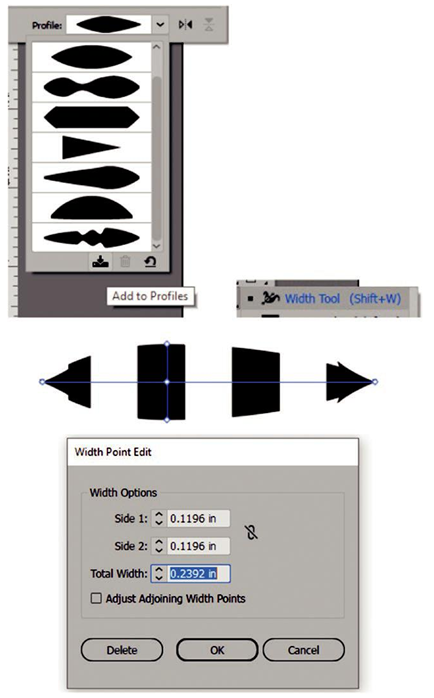
Figure 6-54. Control panel setting a variable width profile, using the Width tool and Width Point Edit dialog box to adjust settings
More details can be found on the Width tool at this page:
https://helpx.adobe.com/illustrator/using/tool-techniques/width-tool.html
Besides the variable width profile, in the Control panel is the brush definition. This connects to the same area as the Brushes panel. By default, it is set to the setting of Uniform and Basic for brush definition, but you can use other settings from the list as well as access more options from the Brush libraries. Refer to Figure 6-55.
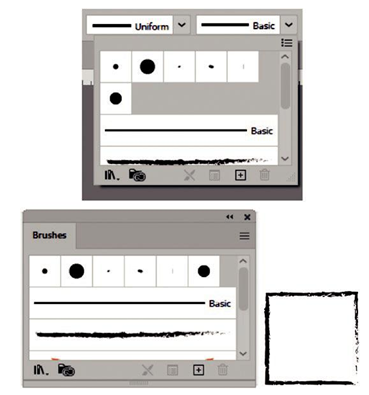
Figure 6-55. Use the Control panel to set various brush definitions from the Brushes panel
Next in the Control panel is opacity which can be set from 0% to 100%. For more options, click the word “Opacity,” and this will bring up the same options found in the Transparency panel. This area allows you to control the blending mode opacity and opacity mask setting and make the mask, link, clip, and invert based on the options chosen. The lower section has more advanced options for Isolate Blending, Knockout Group, and Opacity & Mask Define Knockout Shape. Refer to Figure 6-56.

Figure 6-56. Use the Control panel to access Opacity/ Transparency settings
More advanced options can be found in the menu in the upper right corner of the panel or drop-down list.
The next area allows you to set the style from the drop-down, you can select the option from the list, and this is the same as the Graphic Styles panel. Refer to Figure 6-57.
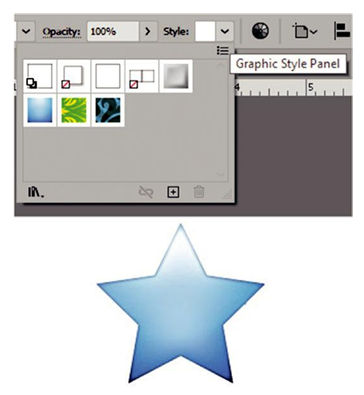
Figure 6-57. Use the Control panel to access graphic styles