The next section, when the shape is selected with the Selection tool, allows you to alter the fill color and stroke color of the shape. These swatches correspond with items found in the Swatches panel. They can be solid colors, gradients, or patterns. In this case, if you want to change the color of either the fill or stroke, you can use the drop-down panel and choose a new swatch. Do this color change one at a time. Refer to Figure 6-49.
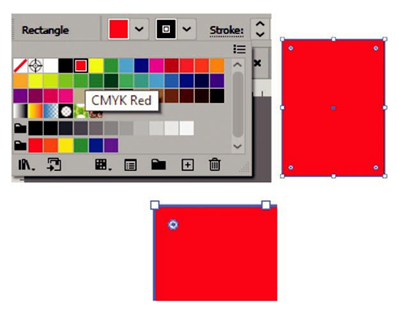
Figure 6-49. Swatches panel options for fill and stroke from the Control panel
The next section allows you to adjust the weight of the stroke. Use the up and down arrows on the text box or type the number in yourself, or select a preset from the drop- down panel. However, if you want to access the Stroke panel for more precise options, click the underlined word “Stroke,” and you will be able to access all of the features in the Stroke panel. From here, you can set the stroke weight. You can also set the following using the icon buttons and text box: cap (butt, round, projecting), corner (miter join, round join, bevel join), and miter limit (1–500) which will make the corner more angled and pointy or flat and smooth, as well as align strokes based on options of center, inside, or outside. By default, it is kept to center. Refer to Figure 6-50.
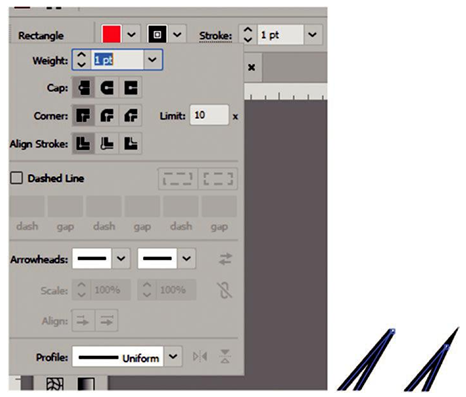
Figure 6-50. Stroke panel options from the Control panel and an adjusted miter limit
Next, you can make the line dashed and add a dash and gap in point size, and using the two icon buttons, you can “preserve exact dash and gap lengths” or “align dashes to corners and path ends, adjusting the lengths to fit.” Depending on the settings, this will cause the dashed stroke to adjust to corners and gaps differently. Refer to Figure 6-51.
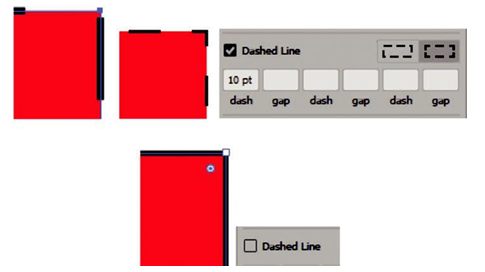
Figure 6-51. Stroked panel options for setting a solid or dashed line
You can uncheck this option if you want the line to be solid again.
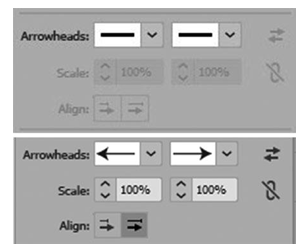
Figure 6-52. Stroke Arrowhead options of none or a selected arrow from the drop-down list