The other tool found with the Direct Selection tool is the Group Selection tool. It’s used on group paths to select individual paths, and multiple clicking will select more paths until all the paths are selected with a grouped object. Refer to Figure 6-33.
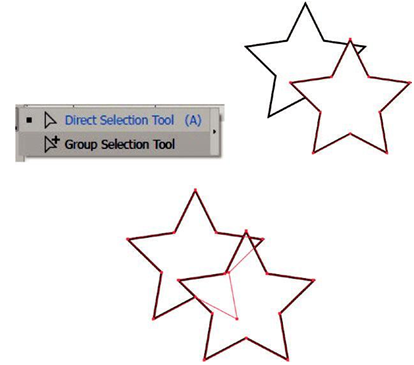
Figure 6-33. Use the Group Selection tool to select one or more paths in a group
To create a grouped object, you need to Shift+Click on each path first or use your Selection tool to drag a marquee around several paths and then, from the main menu, choose Object ➤ Group (Ctrl/CMD+G). This will make the paths all one unit so that with the Selection tool, you can move them together. To ungroup paths, choose Object ➤ Ungroup (Shift +Ctrl/CMD+G). Refer to Figure 6-34.
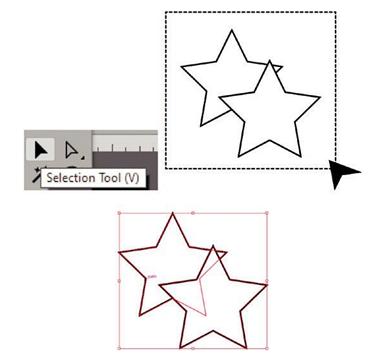
Figure 6-34. Use the Selection tool to select shapes that you want to group
Basic Modification to Shapes
If you want to do some custom adjustments/modifications to a selected shape or path, you can use the Object ➤ Transform menu or one of the corresponding tools in the Toolbars panel to do such precise things like rotation, reflection, scaling, and shearing. You can access these options by double-clicking the tool to access the dialog box for precise settings as well, and create a copy if you do not want to edit the original. Use the preview check in each dialog box, turning it off and on, to check the settings against the original.
•\ Selection Tool, Direct Selection, Group Selection Tools: For the dialog box, use Object ➤ Transform ➤ Move. Adjust position (horizontal and vertical) positive or negative, distance, and angle (0–360) degrees. In the Options by default, the object is transformed, and if patterns were present, they could be transformed as well. The object or copy is moved around the reference point. Click Copy rather than OK when you need to create a moved copy leaving the original in place. Refer to Figure 6-35.
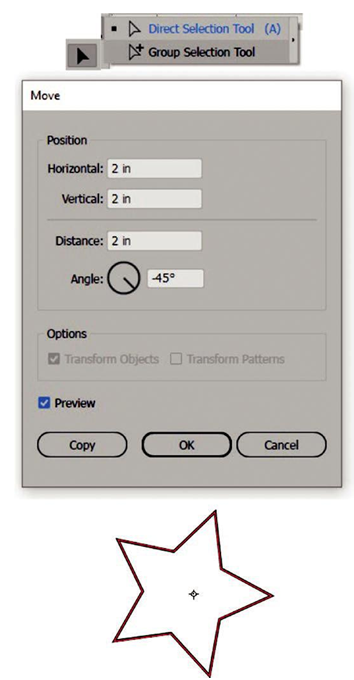
Figure 6-35. The Selection, Direct Selection, and Group Selection tools all have access to the Move dialog box when you double-click them in the Toolbars panel
•\ Rotate Tool (R): For the dialog box, use Object ➤ Transform ➤ Rotate. You can set a rotation angle (0–360) degrees; you can enter positive and negative numbers. In the Options, by default, the object is transformed, and if patterns were present, they could be transformed as well. The object or copy is rotated around the reference point which can be adjusted outside the dialog box if you want to do a manual rotation. Click Copy rather than OK when you need to create a rotated copy leaving the original in place. Refer to Figure 6-36.
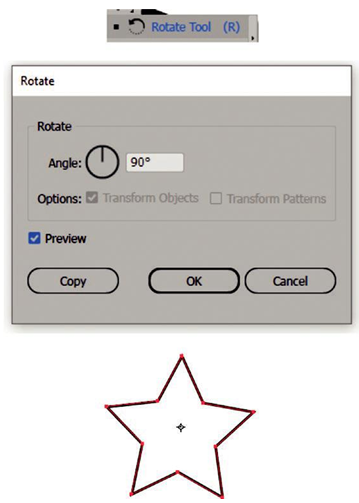
Figure 6-36. Use the Rotate tool or Rotate dialog box to rotate a shape or copy
•\ Reflect Tool (O): For the dialog box, use Object ➤ Transform ➤ Reflect. You can do a reflection on the object’s horizontal or vertical axis, at an angle (0–360) degrees. In the Options, by default, the object is transformed, and if patterns were present, they could be transformed as well. The object or copy is reflected around the reference point which can be adjusted outside the dialog box if you want to do a manual reflection. Click Copy rather than OK when you need to create a reflected copy leaving the original in place. Some shapes, if they are symmetrical on one axis, may show little or no reflection. Refer to Figure 6-37.
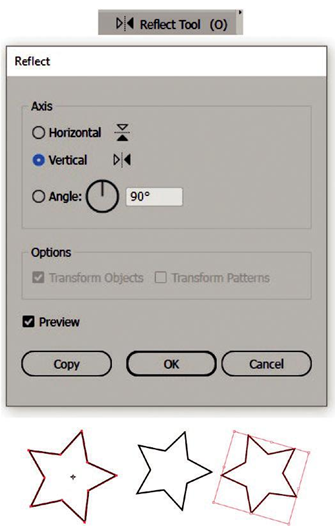
Figure 6-37. Use the Reflect tool or Reflect dialog box to reflect a shape or copy